Add Timeline Index
![]()
![]()
|
Add Timeline Index |
|
|
|
|
Adding a timeline index to the load definition file in the Load Definition File editor consists of the following steps:
Step 1
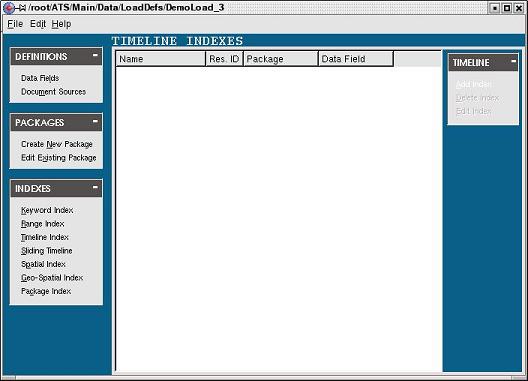
The first step is to select the Timeline Index task in the INDEXES task bar along the left side of the load definition file editor to activate the TIMELINE INDEXES page if it isn't already activated. If the Timeline Index task is not enabled, be sure there is at least one date-time data field defined and has been mapped in the data parsing information of a data file section and/or the data parsing information of a document scanning section. A date-time data field is a numeric data field with either extract date, extract time or extract date-time special processing applied in the data parsing information. To learn how to add a data field see the Add Data Field topic. To learn how to add data parsing information to a data file section see the Add Data Parsing Information topic. To learn how to add data parsing information to a documents scanning section see the Add Data Parsing Information topic.
Step 2
The second step is to select the Add Index task in the TIMELINE task bar along the right side of the TIMELINE INDEXES page:
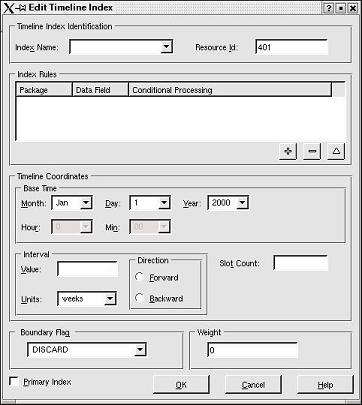
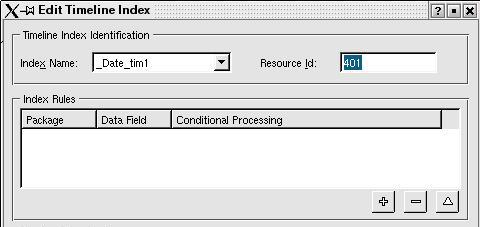
The Edit Timeline Index dialog box will appear:
Step 3
The third step is to specify the Index Name for the timeline index being added:
|
|
The Index Name drop-down list contains a list of unique index names. Either select an index name from the list or enter your own name. Preceeding index names with an underscore ( _ ) is not required, but recommended because it allows for easy recognition when building logic templates and display templates. Proceeding the index name with an index type identifier also helps for this same reason. |
The Index Name uniquely identifies each index.
Step 4
The fourth step is to enter the Resource ID for the timeline index being added:
|
A unique resource id for the index is automatically assigned when the Edit Timeline Index dialog box appears. If you would like to assign your own resource id for the index, change this value. Note: The resource ids that are automatically assigned are based on the maxtableid in the SocketSearch configuration file set to at least 1000. If the resource id that has been assigned exceeds this value, either change the resource id so it is less than the maxtableid or increase the maximum number of resources. If you would like to learn how to change the maxtableid in a SocketSearch configuration file, see the Editing a SocketSearch Configuration File topic of this documentation. |
|
The Resource ID is used internally to uniquely identify the index.
Step 5
The fifth step is to define the Index Rules for the timeline index being added:
|
|
Click the |
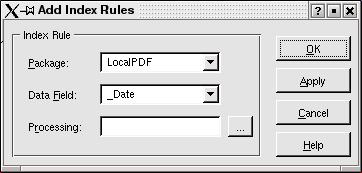
The Timeline Index Rules allows you to specify the package and data field for which this index will be create over.
|
|
Use the Package drop-down list to select the package across which this index will be created over. |
|
|
Use the Data Field drop-down list to select the date-time data field across which this index will be created over. The Data Field drop-down list will only contain date-time data fields defined in the data parsing information of the data file sections or the data parsing information of the document scanning sections defined in the package selected in the Package drop-down list. |
|
Click the ellipse(...) button adjacent to the Processing edit box to open the Edit Processing dialog box. Use the Edit Processing dialog box to define conditional processing necessary for the index rule. Simply enter the conditional processing in the text area provided and click the OK button to add the conditional processing. |
|
Use the Apply button of the Add Timeline Index Rule dialog box to add an index rule without closing the dialog box. Click the OK button to close the dialog box and add the index rule.
Step 6
The sixth step is to enter the Base Time for the timeline index being added:

The Base Time defines the starting point or end point for the timeline. The base time must be a date-time literal or date-time expression that evaluates to a date and time. The base value is evaluated at the time the load is first initialized by LoadInit, and is never altered. The type of special processing on the data field specified for the index effects which drop-down lists are enabled. If extract date special processing is applied, only date drop-down lists are enabled. If the extract time special processing is applied, only the time drop-down lists are enabled. If the extract date-time special processing is applied, both the date and time drop-down lists are enabled.
Step 7
The seventh step is to enter the Interval for the timeline index being added:
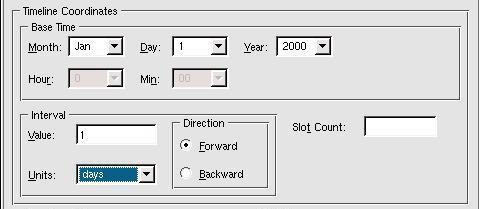
The Interval is the time span mapped by each slot. The time span must be a date-time literal or date-time expression that evaluates to either a positive or negative duration value. The time span is evaluated at the time the load is first initialized by LoadInit, and is never altered.
Step 8
The eighth step is to enter the Slot Count for the timeline index being added:
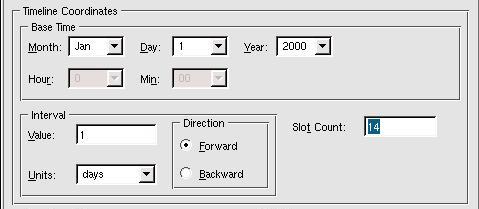
The Slot Count identifies the number of slots in the timeline index. In the above example since our Base Time is Jan 1, 2000, the Interval is 1 day going forward and the Slot Count is set at 14, the time span covered for this timeline index would be between Jan 1, 2000 and Jan 13, 2000.
Step 9
The ninth step is to select the Boundary Flag for the timeline index being added:
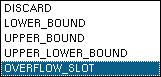
The Boundary Flag determines how times that fall outside the timeline are handled.
Step 10
The tenth step is to enter the Weight for the timeline index being added:
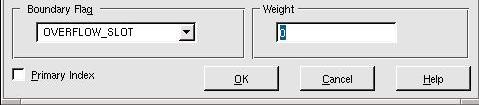
The Weighting value is the weight to be applied to results returned using this index. A value of either 0 or 1 gives the index equal weight with all other indexes.
Step 11
The eleventh step is determine if the index being added will serve as a primary index. If the index is a primary index be sure the Primary Index check-box is checked. If a primary index is already assigned to the package or packages which this index is defined across, you will be prompted with a message to confirm that you would like to change the primary index. In some cases, such as if a sliding timeline index or a package index is the primary index for the package, and you choose to change the primary index, those indexes will be disabled since they must be a primary index.
Step 12
The twelfth step is to click the OK button to add the index to the timeline index list:
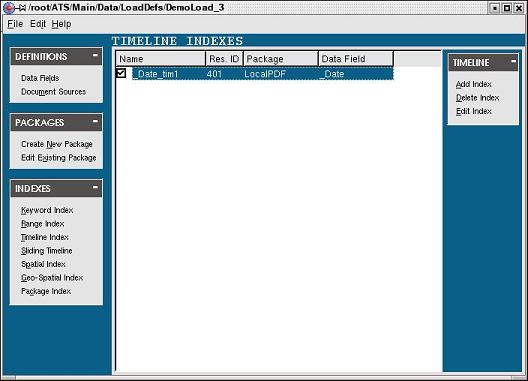
The timeline index is added to the list. Use the check-box to the left of each index to enable and disable the index. If the check-box is checked, the index is enabled and will be processed. If the check-box is unchecked, the index is disabled and will not be processed.
|
|
|

 (add) button to open
the
(add) button to open
the  (delete) button to remove and index rule from the
list. Double-click on an index rule or select and index rule from th
(delete) button to remove and index rule from the
list. Double-click on an index rule or select and index rule from th (edit) button to open the