Creating a Project
![]()
![]()
|
Creating a Project |
|
|
|
|
Select the Create New Project task under the PROJECT TASKS menu in the Project Manager to initiate the project wizard.
The project wizard guides you through the necessary steps to create your new project.
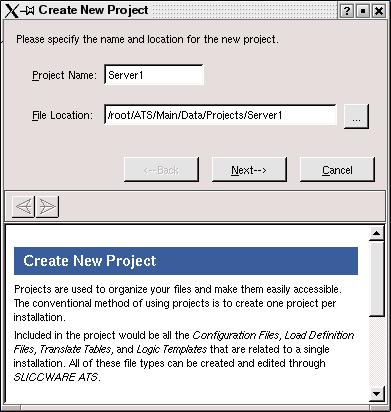
The first page of the project wizard asks you to specify the name and location for the new project:
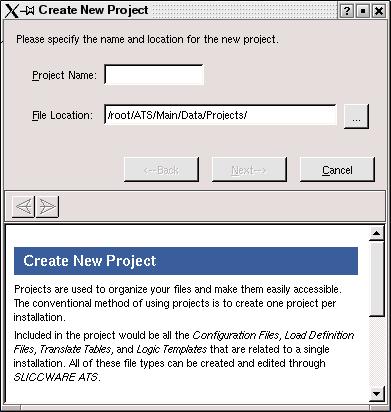
Click the elipse ( ... ) adjacent to the File Location path to browse the local file system for the destination of the project file.
Project Name
The Project Name is the identifier for the particular project being created.
It can, but does not have to be the same as the file name. Conventionally,
the name of the server for which this installation will reside is used
as the project name.
File Location
The File Location is the path where the project file will be located. Project
files are identified by the .sli extension. The Project file contains the
paths to the SLICCWARE files which have been included in the project.
After specifying the Project Name and File Location click the Next--> button to move to the next page of the project wizard.
The next page of the project wizard asks you to select how the first file of the project will be added:
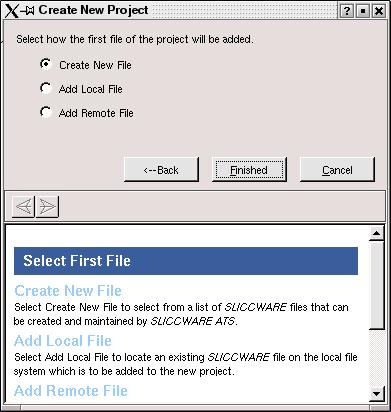
Three options are available for adding the first file to the project:
|
Option |
Description |
|
Start a new SLICCWARE file. | |
|
Add an existing SLICCWARE file residing on the local file system. | |
|
Add an existing SLICCWARE file residing on a remote file system. |
After you have selected the method that the first file will be added, click the Finished button to exit the project wizard and continue the specified method.
|
|
|

